Christmas/Winter Punch Art: Mason Jar Snow Globe
 Snow Globe Punch Art
Use as gift tags, package decorations, paper tree ornaments, string them together to make a paper garland for tree or mantle/etc., use on a handmade greeting card, great for a kid’s craft, scrapbook, & more…..
I love punch art and snow globes so why not compare the two? This is a super easy project to do – the hardest part is to glue down the snow flurries without getting glue “all over” the place!
If u have any questions please let me know. Hope u enjoy the project!!!
ITEMS NEEDED:
Blue cardstock
White & cream cardstock
Cardstock scraps in other assorted colors and patterns
ALSO NEEDED:
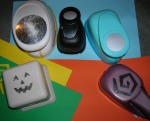
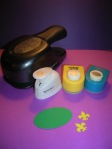
Mason Jar Punch
Large Wave Edging Scissors
Other Assorted Punches: deer, moose, tree, etc.
Scissors
Glue Stick
Mini Circle Punch
INSTRUCTIONS:
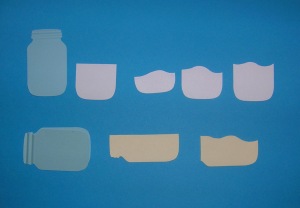
- Punch mason jar shapes in shades of blue. I like to crimp the neck of the jar to give it a more realistic appearance.
- Next cut strips of paper about 1 1/2″ wide and punch the “snow drifts”. I like to vary the depth of the snow. I also punched some snow drifts long wise for the jar to lie on it’s side.
- Use large wave edging scissors to give the snow a wind scalloped appearance.
- Glue the snow drift to the jar front.
- Punch small/mini shapes – trees, moose, etc. in plain and patterned cardstock. This is a great way to use up paper scraps.
- Crimp brown paper and then punch select shapes (ex: trees, snowmen) to glue behind the colored shapes to create a 3D effect.
- Lay out designs and then glue them down.
- Last glue the tiny white/cream/silver circles to the exposed blue to create a snow storm. Add one or two mini snowflakes for a special accent.

Thanks so much for seeing “What I’m Up To!!!!”
buggalcrafts
Here are some tips for making ur “snow globes”!
- Fir Trees: Trim trunk from green/patterned fir trees. Glue a brown tree to the back of the green tree. To create more depth use a second brown tree behind one of the “firs” if using them as a pair. Glue the thicker tree to the edge of the thinner tree.
- Trim Fat Tree to Cone Tree: Trim trunk from the tree. Glue a brown tree to the back of the green tree. When dry trim the tree into a cone shape.
- Bare Branch Icy Trees: Punch brown trees and then glue the white trees on top of the brown trees. Let dry. Trim the trees to fit snow globe.
- Christmas Tree: Trim trunk from the green tree and glue a brown tree to the back of the green tree. Trim candy canes to fit the tree and then glue on tree along with the “ball ornaments” (circles).
- Snowman #1: Use a cream snowman on a white snowdrift to set the snowman off the best (and vice versa). Trim the arms off the white/cream snowman and glue the brown snowman to the back. Trim excess paper off hat and glue to snowman’s hat. Add eyes with a black marker. Cut a tiny carrot nose and glue on face. Trim a mini heart punch to fit the snowman and glue in place. Or add buttons to the snowman with a marker.
- Snowman #2: Trim the arms off the white/cream snowman and glue the brown snowman to the back. Trim the hat to roughly a round shape. Glue small circle to the snowman’s head. Add eyes with a black marker. Cut a tiny carrot nose and glue on face. Trim a heart punch to fit snowman and glue in place. Or add buttons to the snowman with a marker.
- Reindeer & Moose: Trim the antlers off the deer & moose. Attach the crimped antlers to the back of the animal. Attach a small red rhinestone or the glittery red circles provided to face of the reindeer. Glue brown circles behind the glittery red circle to make the nose stand out.
- Penguin: Trim the feet and bill off the black penguin. Glue the yellow penguin behind the black one. Glue stocking cap to head of penguin.
- Other Animals: Glue a crimped brown shape to the colored shape. Allow to dry then glue to snow.
- Gingerbread Cottage: Trim icy roof from glittery cottage and glue on top of gingerbread cottage. Trim candy canes and glue on “path” to the cottage. Glue smoke puffs in place or use snow.
- Snow Flakes/Circles: Use the mini snowflakes to accent snow globe – one per globe. Use the tiny circles to create a “shaken snow globe snowstorm”.
- Snow Scene on a Homemade Card: One cute way to use ur snow globes is to spread the scene out over 3 snow globes and then use the set on the front of a homemade card.